H2: What RAM Does and Why an Upgrade Helps
RAM, short for random access memory, is the fast working space your computer uses while programs are open. When you open a browser, a game, or a document, the computer loads the parts it needs into RAM so it can reach them quickly. When RAM fills up, the computer must shuffle data back and forth to slower storage, and that shuffling is often what makes a machine feel slow, with programs pausing, tabs reloading, or games stuttering. Adding more RAM gives the computer more room to keep things ready, so switching between tasks feels smoother. It will not fix every slowdown, because an old processor or a full, slow drive can also hold a system back, but for a computer that struggles mainly when many programs are open, a memory upgrade is often one of the simplest and most noticeable improvements. The chips themselves are marvels of manufacturing, as how microchips are made explains, and they are designed to be replaced or added to in many desktop computers.
H2: Check Compatibility Before You Buy Anything
The most important rule of a RAM upgrade is that not all memory fits all computers. You need to know the type of memory your computer uses, the maximum amount it supports, how many memory slots it has, and whether it uses a desktop or laptop form factor. Your computer manual, the system information screen, or the motherboard manual usually lists these details, and it is worth writing them down before shopping. Buying the wrong type is a common and avoidable mistake, because the notches on memory sticks are placed differently for different generations, so a wrong stick simply will not fit. Also check whether your current memory is installed in pairs, since many computers perform best when memory is installed in matched pairs. A little research at this stage saves a return trip, and browsing hidden tech gems and coolest gadgets can help you compare reliable memory options without being swayed by flashy packaging alone.
H2: How Much RAM Do You Actually Need
How much memory is enough depends on how you use your computer, not on what the largest available kit promises. A computer used mainly for browsing, email, documents, and video calls can feel comfortable with a modest amount, while a computer used for gaming, photo editing, or running many programs at once benefits from more room. If you regularly keep dozens of browser tabs open alongside other programs, extra memory helps those tabs stay ready instead of reloading every time you return to them. Rather than guessing, open your system monitor during a normal busy day and see how much memory is in use. If it is regularly near full, an upgrade is likely to help. If it rarely gets close to full, your slowdowns probably come from somewhere else, and spending on memory alone may not change much. This kind of honest check, applied to everything from connected devices to smart devices in daily life, keeps upgrades practical instead of purely hopeful.
H2: Preparing Safely for the Install
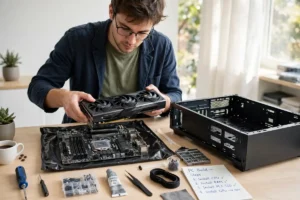
Before you open any computer, save your work, shut the computer down fully, and unplug it from the wall. For a laptop, follow the manual for removing the battery if it is removable, and for a desktop, press the power button once after unplugging to discharge any remaining power. Work on a clean, non-carpeted surface if possible, and touch a metal part of the case to discharge static before handling the new memory. Hold memory sticks by their edges, never by the gold connectors, and keep them in their protective packaging until the moment you install them. Take a photo of the inside of the computer before you change anything, so you can see exactly how the old sticks were placed and which slots were used. These small habits protect both you and the computer, and they make the whole job feel calm rather than rushed.
H2: Installing the New Memory Step by Step
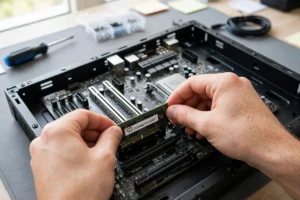
Open the case or memory cover following your manual, and locate the memory slots on the motherboard. If you are replacing old memory, gently push the small clips at each end of a stick outward, and the stick will lift out. To install a new stick, line up the notch on the stick with the notch in the slot, hold the stick by its edges, and press down evenly with both thumbs until the clips click into place on their own. Do not force a stick that does not line up, since the notch is there to prevent a wrong fit. If you are installing a pair, use the slots recommended in the manual, which are often color-coded or spaced apart for best performance. Once the sticks are seated, close the case, plug the computer back in, and start it up. The first startup may take a little longer than usual while the system recognizes the new memory.
Checking That the Upgrade Worked
After the computer starts, open the system information screen and confirm that the total memory shown matches what you installed. Then open the programs you normally use and notice whether switching between them feels smoother. If the computer does not start, or shows less memory than expected, turn it off, unplug it, and reseat the sticks, pressing them firmly until the clips engage. A stick that looks seated but is slightly raised on one end is a common cause of a failed startup. As with other technology, from noise-cancelling headphones to how drones work, careful installation and a simple test afterward matter more than speed. Keep the old memory and packaging for a while, in case you need to test whether a problem came from the new sticks.
H2: When RAM Is Not the Answer
Sometimes a memory upgrade helps only a little, and that is useful information rather than a failure. If your computer still feels slow with plenty of free memory, the bottleneck may be a nearly full drive, an older processor, or too many programs starting automatically. Cleaning up startup programs, freeing drive space, and updating software can help, and a basic understanding of how the internet works and how Wi-Fi works can also explain why online tasks feel slow even when the computer itself is fine. Looking ahead, emerging technologies and quantum computing show how computing keeps changing, but the principle stays the same: upgrade the part that is actually holding you back, test the result, and enjoy a computer that fits the way you really work.
H2: Desktop and Laptop Differences
Upgrading memory is usually easier on a desktop than on a laptop, and it helps to know which kind of computer you have before you start. Desktops often have several memory slots behind a side panel, while laptops may have a small cover on the underside, or memory that is soldered in place and cannot be changed at all. Some thin laptops have no user-upgradeable memory, and in those cases the only practical options are freeing up memory by closing programs or planning for a future computer. Checking the manual first avoids opening a machine that was never meant to be opened by the user. If your laptop does allow an upgrade, the same rules apply: match the type, use the recommended slots, and handle the sticks by their edges.
H2: Mistakes That Cause Most Upgrade Problems
Most memory upgrade problems come from rushing rather than from faulty parts. Installing a stick that is not fully seated is the most common issue, followed by using the wrong memory type and forgetting to unplug the computer first. Another common mistake is touching the gold connectors, which can leave oils that interfere with the connection. Working in a hurry, in poor light, or on a cluttered surface makes all of these mistakes more likely. A calm workspace, a photo of the original setup, and a final check that every clip has clicked into place will prevent most trouble. If the computer beeps, shows an error, or fails to start after an upgrade, the first step is always to turn it off, unplug it, and reseat the memory carefully.
H2: Getting More From the Memory You Have
Even after an upgrade, good habits help your computer feel fast. Close programs you are not using, especially browser tabs with video or large documents, and check which programs start automatically when the computer boots. Keeping your drive from filling completely also helps, because a full drive leaves little room for temporary files. Restarting the computer from time to time clears temporary memory use and can restore responsiveness after a long session. These habits do not replace a needed upgrade, but they make the most of the memory you have, and they help you notice sooner when a future upgrade would actually help.
A Final Check Before You Close the Case
Before you close the case or replace the laptop cover, take one last look inside. Confirm that every memory clip is fully engaged, that no cable was knocked loose while you worked, and that no screw or tool was left inside the machine. Then start the computer and confirm the new total memory, open a few of your usual programs, and use the computer normally for a day before deciding the upgrade is complete. If everything feels smoother and the system information shows the correct amount, the job is done. Keeping the old memory in a labeled bag for a few weeks is a sensible precaution, in case you ever need to test the system with the original parts again.